Ensuring Dental Safety: A Guide to Sterilization Indicators and Their Vital Role in Dentistry
Sterilization in various fields, including healthcare and dentistry, plays a critical role in eradicating harmful microorganisms from equipment and instruments to ensure safety. To ascertain the effectiveness of sterilization processes, the implementation of chemical and biological indicators serves as an indispensable practice, providing valuable insights into the process and eventual success of the sterilization procedures.
What Are the Different Types?
Chemical Indicators
There are 6 different types of chemical indicators when it comes to steam sterilization. To ensure a dental office using the correct indicators refer to the governing bodies Infection Prevention and Control guidelines.
Type 1 – Process Indicator
Process indicators differentiate whether a pack and/or pouch has been processed through a sterilizer and exposed to steam. A process indicator does not have any value in providing quality assurance testing results, they are simply a visual check.
Example: Autoclave Tape
Type 2- Specific use Indicators
Some sterilizers require a specific test to evaluate the air removal inside the sterilizers chamber to allow the entrance of for proper sterilization. The test is required prior to use each day only in pre heated pre-vacuum sterilizers.
Example: Bowie-Dick Test
Type 3- Single Variable Process Indicator
These indicators only react to one critical variable of steam sterilization that is specific to temperature for a certain amount of time.
Example: Chemical Pellets (rarely used in Dentistry)
Type 4- Multivariable Process Indicator
These indicators react to two critical variables of steam sterilization. A Type 4 is manufactured as a paper strip as well as small dots located on the interior and exterior of sterilization pouches. The markings change color once exposed to two of the sterilization variables.
Example: Self-Sealing Sterilization Pouches
Type 5- Integrating Indicator
Type 5 indicators react to all three of the critical variables of steam sterilization: time, temperature, and pressure. A Type 5 has two roles. One, placed inside a cassette and / or pouch to monitor and confirm the time, temperature and pressure is adequate on the inside of the package. Two, placed inside a PCD (process challenging device) to monitor and release an instrument load instead of waiting for the BI testing results.
Example: Internal chemical indicator (Type 5) strip added to cassettes and PCD. For best practice add to each pouch.
Type 6- Emulating Indicator
Emulating indicators are used to verify specific cycles and react to all critical variables. They are used independent of a BI.
Example: Commonly used in European countries where BI’s are no longer employed.
Biological Indicators
A biological indicator (BI) serves as a tool to verify whether the conditions necessary for effectively eliminating a specific quantity of microorganisms through the sterilization process have been met. This verification instills a crucial level of confidence in the reliability of the sterilization procedures. Typically, these indicators utilize vegetative endospores, which are a particular type of microorganism commonly used as a testing benchmark within the dental field.
There are many sterilization methods out there, each having a specific type of organism within the indicator that is meant for each approach.
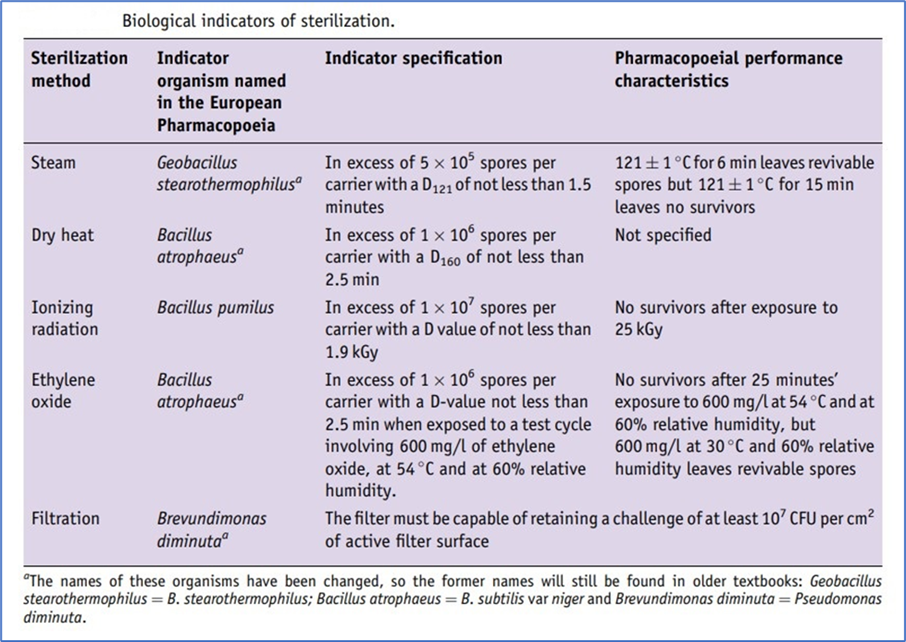
https://pharmasciences.in/types-of-biological-indicators-for-sterilization/
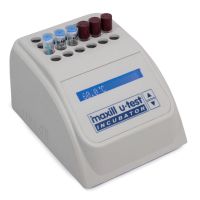
BI’s must be used according to a province’s Infection Prevention and Control (IPAC) guidelines. In Ontario a BI is used daily in the first load of the day, with any load containing implantable devices, and on any additional sterilization MODE used in the same day. A series of three BI’s are also required when re-qualifying a sterilizer to confirm it is fit for use post a repair, relocation, disturbance to power source, etc. After sterilization, the processed BI will require incubation. To ensure quality control in testing, an unprocessed BI from the same lot as the processed BI is run as a control for the day.
There are many biological indicators on the market that differ in incubation times ranging from 24 minutes to 48 hours.
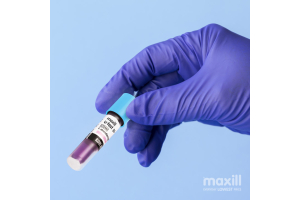
24-minute/1-hour/3-hour Biological Indicators (Fluorescent results)
These biological indicators are great for offices that quarantine their instruments after each reprocessing cycle, showing a fluorescent result within a 24-min, 1-hour and 3-hour incubation period. To verify by pH colour change for visual confirmation, they must be incubated for minimum of 48 hours to a maximum of 7 days as per the fine print located in the manufacturer’s instruction for use.
Regulations in Canada state a type 5 indicators is required in each load acting as a load leader in a PCD and for best practice-in each pouch/pack, which for some provinces is now mandatory. Each load can be released based on the passing outcome from the Type 5 indicator, negating the need to quarantine and use a rapid test to release the load.
Some offices may still use a 24 min BI out of convenience, to reduce waiting time for results, or may still quarantine their instruments for extra precaution.
24-hour/48-hour Biological Indicators (+/- Spore Growth)
Unlike the quicker BI’s, the 24 and 48-hour biological indicators function with a longer incubation time for results as they do not have a fluorescent response and rely on the presence or absence of bacterial spore growth for a pass or fail. If a process BI has failed, the visual pH colour changes in the vial to indicate the presence of bacterial growth. See the table below for a summary of the color changes indicating a pass (negative) or fail (positive).
 |
Processed BI
|
Negative Growth=No colour change PASS |
 |
Control BI |
Positive Growth=Colour change FAIL
|
Whose Job is Sterilization Monitoring in the Dental Office?
EVERYONE! The entire team must be knowledgeable and trained on the different quality assurance testing methods as for their mechanism, purpose, and measurement properties and outcomes. It is every staff members responsibility to keep the public safe!
Lead Author: Michelle Aubé (Simmonds), RDH
Co-Author: Chris Weichenthal CDAII
Michelle Aubé (Simmonds) RDH, maxill Dental Hygiene Educator
Michelle is a Dental Hygiene Speaker, Consultant and Educator with over 30 years of experience as a RDH and 4 years as a CDA. She is a professor and curriculum writer at Fanshawe College in both the dental hygiene and continuing education program sharing her knowledge in IPAC, professional practice, periodontal classification, social justice, advocacy and clinical applications. She is maxill's CE and IPAC Director and wears various IPAC hats including auditing federal correctional facilities dental clinics for IPAC standards. Michelle is ODHA's Regional Board Director and authors articles for CDHA's OH Canada professional publication and continues to practice clinically in London ON. She is a CDHO IPAC Remedial Facilitator and IPAC Expert Opinion. Her strong ethics has allowed her to serve on the Discipline Committee at Algonquin College and hold the position of a CDHO Quality Assurance Assessor for 7 years. As a lifelong learner she is completing a BA in Adult Education at Brock University. Her diverse dental background and current status as a practicing RDH offer a fulsome and realistic view of dental-related topics. As a passionate champion for the profession, she advocates for equity, professional autonomy, and systemic change, true grassroots leadership at its finest.
Michelle can be reached at [email protected]
Chris Weichenthal CDAII
With over two decades of dedicated experience in the dental field, Chris brings a wealth of dental knowledge and expertise to maxill. She’s had the privilege of collaborating with a diverse range of dental specialists, honing her expertise in various facets of oral healthcare. Her true passion however lies in patient education. She derives immense satisfaction from empowering patients with the knowledge they need to make informed decisions about their oral health. Chris is continuously driven to evolve and share her extensive dental knowledge, and remains committed to nurturing the future of dentistry, fostering a legacy of informed practitioners who prioritize patient well-being and excellence in oral healthcare.